


If you’re searching for ways to streamline your haircare and styling routines, consider a treatment bun. This styling method, which involves pulling your hair back with a nourishing leave-in product, helps keep your hair neatly styled while improving the look and feel of your hair. Below, watch a quick treatment bun tutorial from content creator Niara Alexis, then keep scrolling for all the deets on how to try this trendy technique yourself.
Credit: @Niara Alexis
What Is a Treatment Bun?
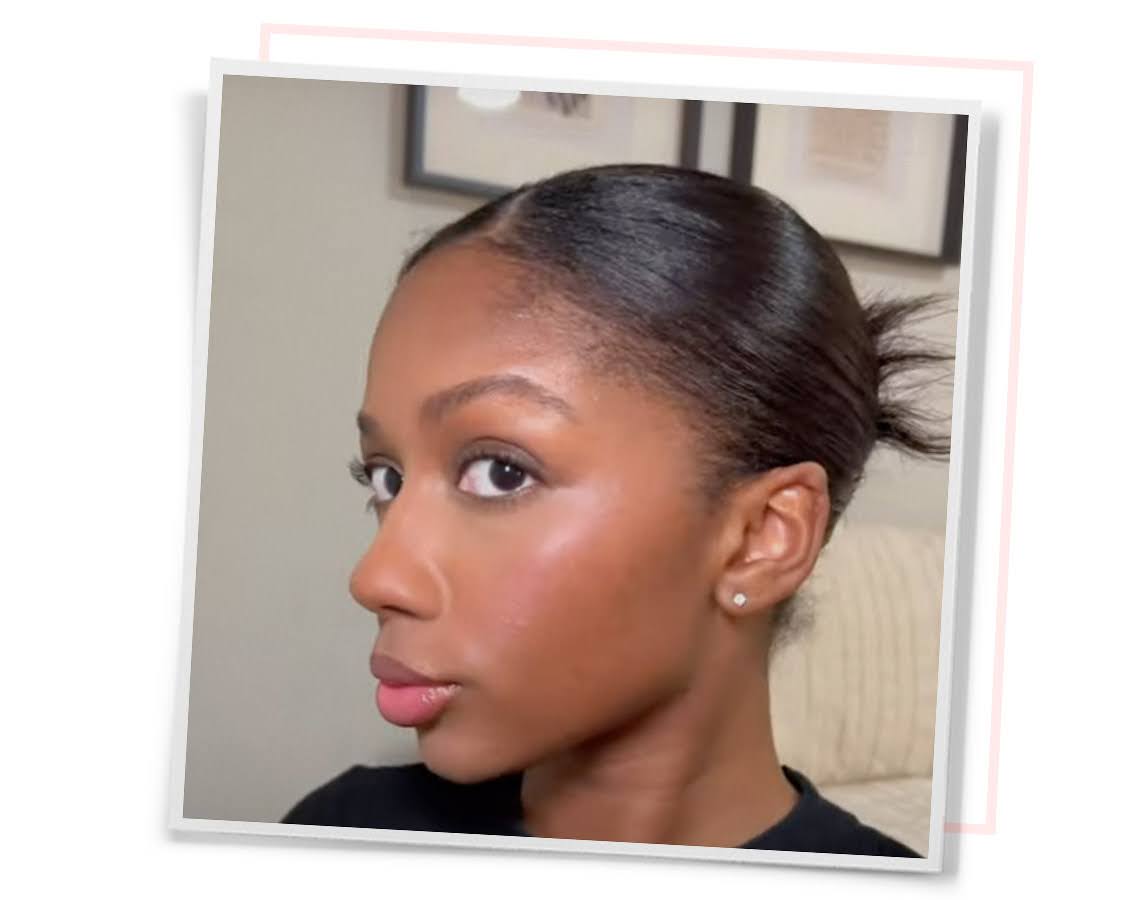
A treatment bun is a hairstyle that involves slicking your hair into a bun using any kind of hair treatment (think conditioner, oil, leave-in, or hair mask) instead of a hair gel. The thought is that you can simultaneously sport a trending hairstyle while doing something good for your strands, like improving hydration or repairing damage. Sleek buns are incredibly versatile, too, so you can give your hair some TLC from anywhere—whether you’re running errands or hitting happy hour.
3 Treatment Bun Tips
Here are three things to consider when opting for the multitasking hairstyle.
Create it on dry hair
One of the biggest mistakes people make when creating slicked-backed hairstyles is starting with wet hair. Hair is actually weaker when it’s wet, and pulling strands into a tightly-wound hairstyle can make them more vulnerable to breakage or shedding. Fake the look of wet strands for your treatment bun by greasing your mane with hair oil or dampening it with a leave-in conditioner before applying other formulas. For the latter, we’re partial to Mizani’s 25 Miracle Milk Leave-In Conditioner, which provides hair with 25 benefits in just a few spritzes.
Sport the look ahead of wash day
This style is for you if you’re constantly battling greasy hair. The glossy, reflective finish of treatment buns makes them the perfect solution for helping unwashed hair appear stylish and intentional. Opt for a treatment bun when you’re a few days out from your last shampoo session, and nobody will be the wiser.
Apply the right amount of product
To get the best results from your chosen treatment, it’s important to use the right amount of product based on your hair type and density. If you have thick, coarse, or long hair, try sectioning your hair and doubling up on the recommended amount of product to ensure every inch of your hair gets covered. Conversely, those with thin, fine, or short hair may want to consider starting with less product and adding more later to help prevent oversaturation.
If you do go a little overboard on product when doing your treatment bun, use a clarifying formula like Biolage Professional Scalp Sync Clarifying Shampoo to help remove residue and buildup.
How To Do a Treatment Bun
Doing a treatment bun is not so different from creating a traditional slicked-back bun. Follow these steps to get it just right:
Step 1: Part your hair
First, decide where you want to part your hair—this decision can dictate your overall vibe. A classic middle part is ideal for an off-duty model look, while a side part is the way to go if you want to soften your features or conceal a cowlick. You can also get a bit more playful with your bun and try your hand at a zigzag part, Y2K-style.
Step 2: Apply your treatments
Apply your chosen hair treatment to dry, unwashed hair, taking care to slather it from the mid-lengths to the ends. We love using rich masks for this step, but there is no hard-and-fast rule as to what works best. Regardless of the formula used, your hair should look damp and reflective before you begin forming the shape of your bun.
If you have dry or brittle hair, consider using Matrix Food For Soft Rich Hydrating Treatment Mask to craft your treatment bun. This avocado oil and hyaluronic acid-infused mask helps replenish hydration. Hair will be left smooth, shiny, and soft with less frizz. Another great option is Redken’s All Soft Moisture Restore Leave-In Treatment, an acidic leave-in that helps trap moisture molecules and seal the hair’s cuticle for immediate hydration.
Editor’s Tip: For more personalized options, check out our articles, Our 35 Best Hair Masks for Every Hair Type and Concern or 15 Hair-Strengthening Products for Dry, Brittle Hair.
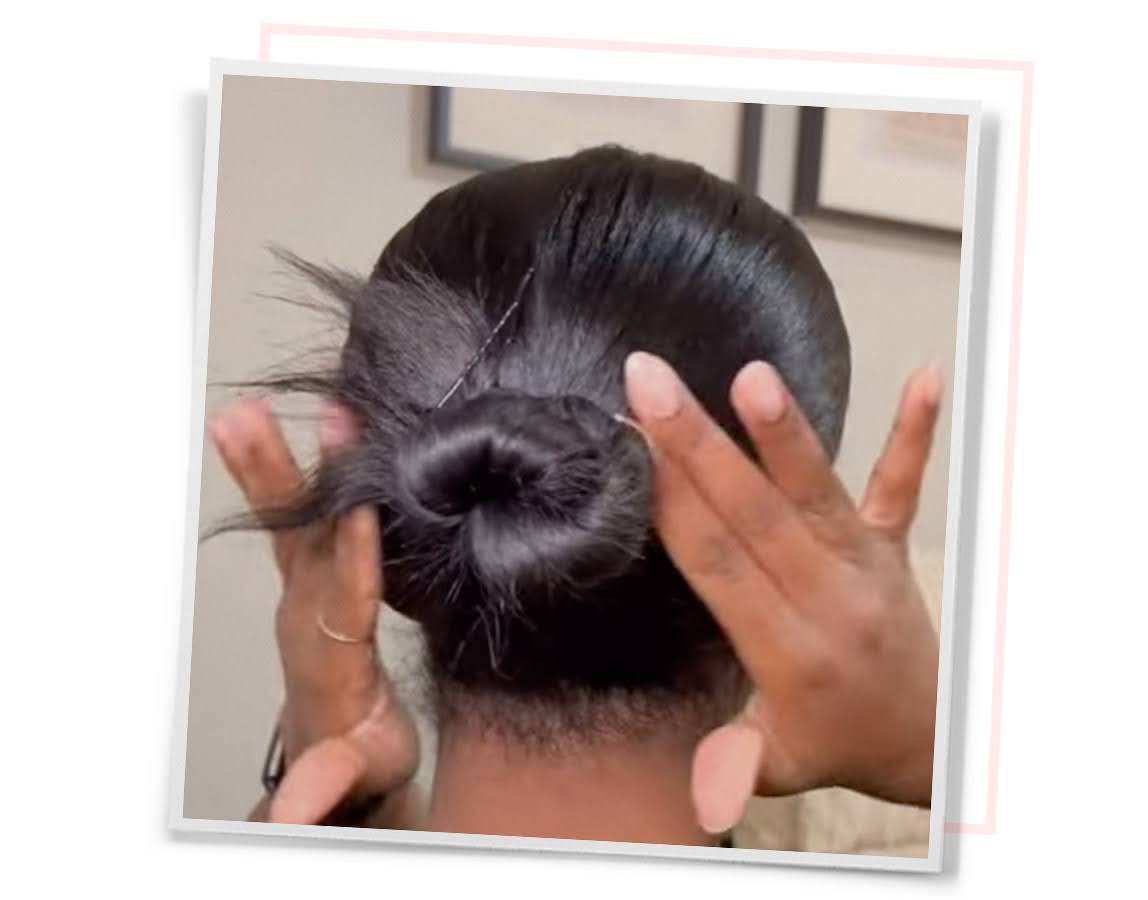
Step 3: Form your bun
With your hair treatment coating your stands, tie your dampened hair into a low ponytail just above the nape of your neck. Twist your ponytail with your fingers and then wrap its length around your hair tie to form a donut shape. Use another hair tie or a hair bungee to hold your bun in place. You can let your ends fly loose for a messier finish or use bobby pins to help tuck them away for a more polished appearance.
Next Up: How to Do a Slicked-Back Bun In 5 Easy Steps
Header photo credits: Matrix and @niaraalexis
Use our salon locator to try an updo with a pro in your area.


