

Social media has no shortage of tips for achieving defined, hydrated, and frizz-free curls—and the latest curly hair hack we can’t get enough of is the bowl method. Sticking your head upside down in a bowl filled with water might sound a tad unusual at first, but hear us out: There’s a strategic method to this approach that has curly gals (and guys) all over TikTok raving about its ringlet-defining results.
Ahead, learn more about the bowl method for curly hair and discover the steps you can take to try the technique yourself.
What Is the Bowl Method?
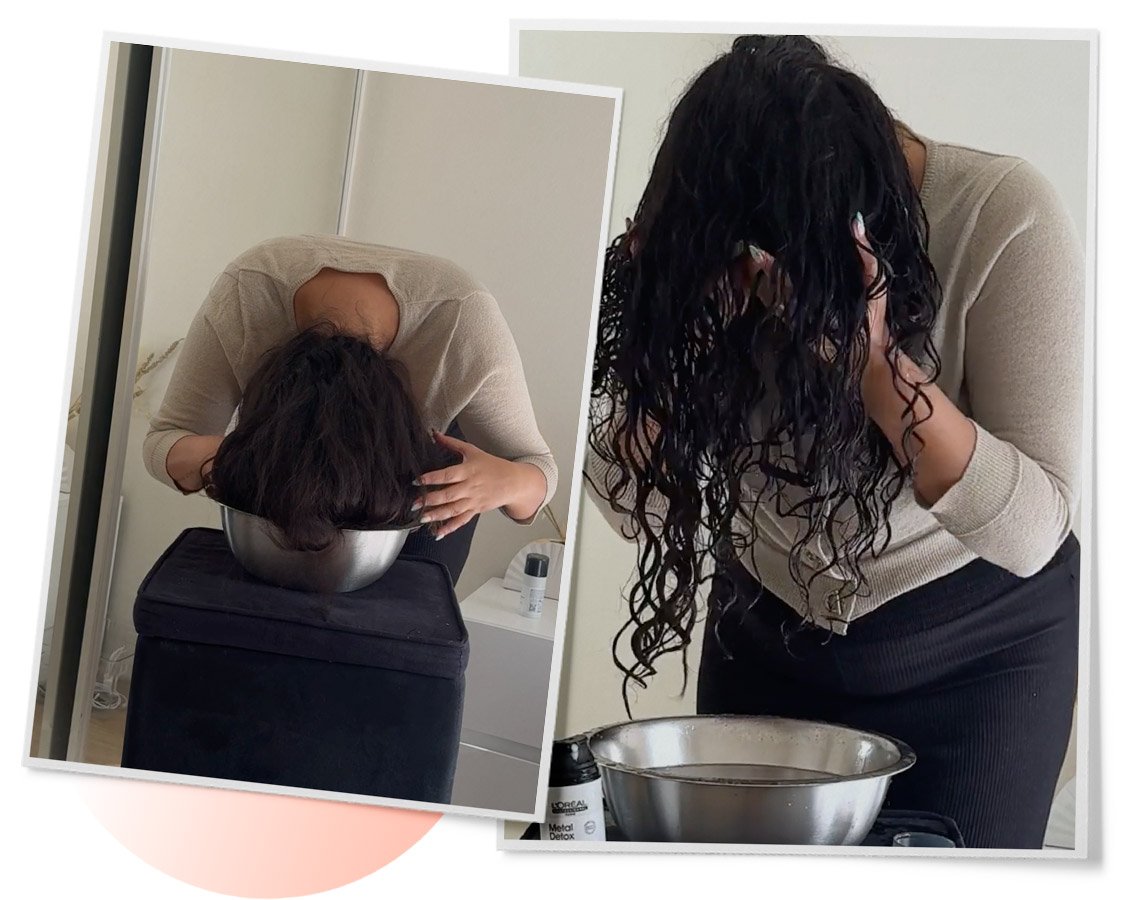
The bowl method is a curl-enhancing technique that involves repeatedly dunking and scrunching your hair upside down in a bowl of water. Fans of the bowl method say it helps create curl clumps that add more definition and volume to their curly, wavy, or coily hair.
The idea behind this method is fairly straightforward: Your curls require a lot of moisture to look bouncy and shapely. The bowl method aims to help maximize hydration by using water to your advantage for smoother, more defined curls. Plus, diluting your styling products is also believed to boost their moisturizing benefits and help prevent crunchy hair.
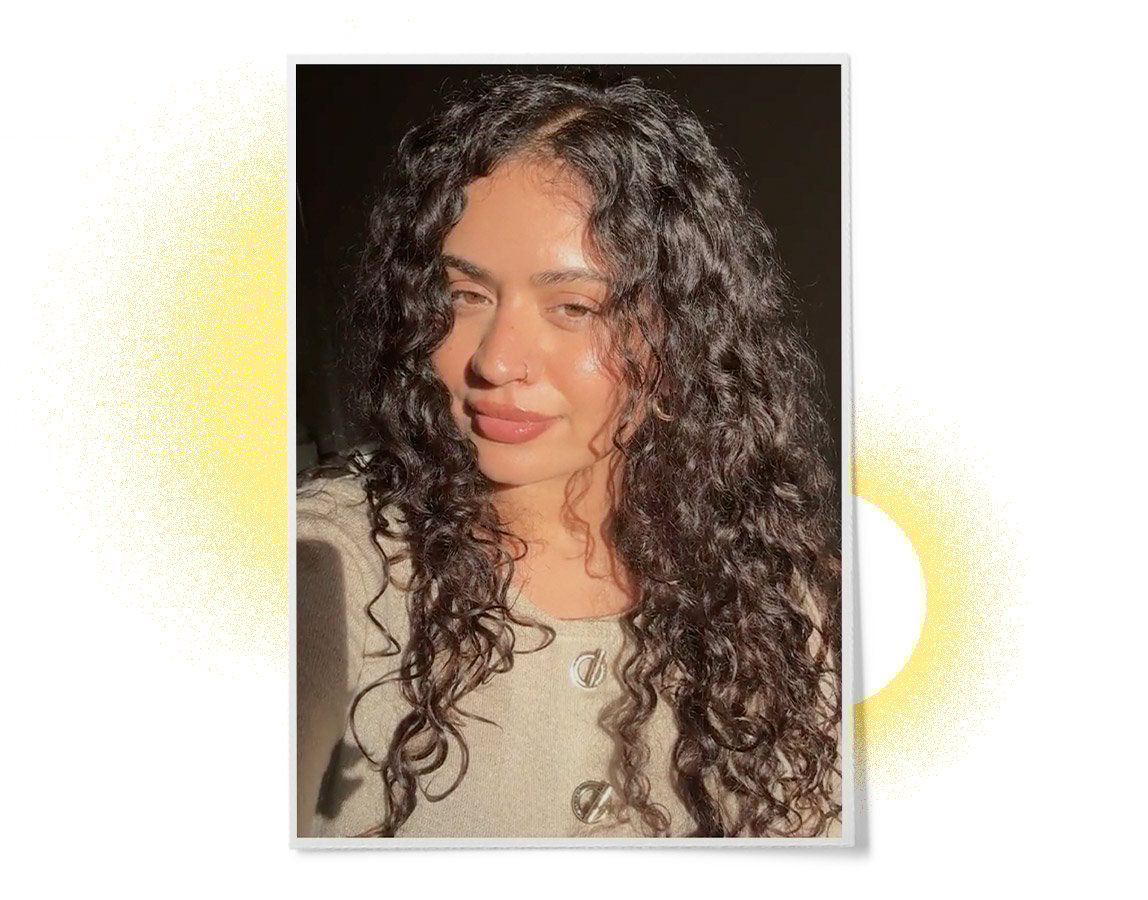
Good hair day by @chelseahln
Try the Bowl Method In 6 Easy Steps
you need for this technique is a large bowl filled with water and your favorite styling products. Here’s how to master the bowl method for curly hair in six simple steps.
Step 1: Shampoo and condition your hair
To start, shampoo and condition your hair as usual with a haircare system for curly hair. We’re partial to Redken All Soft Mega Curls Shampoo and Conditioner. This sulfate-free shampoo and conditioner duo is designed to nourish and hydrate severely dry curls and coils for visibly softer, healthier-looking hair.
Step 2: Detangle and apply leave-in conditioner
Detangle your curls using a wide-tooth comb and a hair detangler, like Mizani 25 Miracle Milk Leave-In Conditioner. Then, flip your hair over and apply a leave-in conditioning cream from root to tip. One of our favorites is Mizani Coconut Souffle Light Moisturizing Hairdress, a whipped hair moisturizer for all curl types that provides featherlight hydration while restoring your hair’s natural shine.
Editor Tip: If you suspect that hard water is damaging your curls, try L’Oreal Professionnel Metal Detox Leave-In Styling Cream for this step. This moisturizing and anti-frizz cream helps remove metals to prevent hair breakage and color shift.
Step 3: Prepare a big bowl of water
Fill a large bowl with water and place it on a flat surface. We suggest using lukewarm or cool water if your curls are prone to dryness or frizz—hot water can strip much-needed moisture from your strands.
Step 4: Dunk, scrunch, and repeat
Flip your hair over and place it into the bowl—start with your ends and then continue until the water touches your scalp. Lift your hair up out of the bowl and begin scrunching it, allowing the excess water to drip back down into the bowl. Ideally, you’ll want to repeat this “scrunch and dunk” combo at least two or three times.
Step 5: Apply a curl styling gel and hair oil
Between dunks, apply your styling products to your soaking-wet hair. We recommend going with a curl styling gel first (this is to avoid that crunchiness we mentioned earlier), like Biolage Professional Gelée Styler or Matrix A Curl Can Dream Light Hold Gel. Then, dunk and scrunch again, following it up with a nourishing hair oil or serum—we love the Food For Soft Multi-Use Hair Oil Serum from Matrix. This leave-in treatment is infused with hyaluronic acid and avocado oil for softer, smoother, and shinier curls.
Step 6: Diffuse or air dry
Next, it’s time to style your curls. Squeeze the excess water from your hair and use a soft, microfiber towel to gently scrunch your hair upside down again. Once your locks are no longer dripping, flip them over, shake them out, and air dry. If plopping is your thing, gather all of your hair at the top of your head and wrap it in a cotton T-shirt at this stage.
Or, you can opt for a diffuser to help speed things along. Diffusers are blow dryer attachments that disperse hot air over a larger area of your hair to help keep your curls separated while you dry them. This must-have curly girl accessory can help eliminate frizz while adding serious definition and volume to your ringlets, coils, or waves.
Good hair day by @chelseahln
Bowl Method Alternatives for Curly Hair
The bowl method is definitely trending right now, but some curlies note that it can be time-consuming. Fortunately, it’s not the only way to make your curls pop. If you’re not feeling the bowl method, don’t stress—you can still enhance your natural curl pattern with other tried-and-true techniques.
Keep it simple with a classic leave-in conditioner approach.
One alternative is to ditch the bowl and stick to the classic leave-in conditioner method for curly hair. This is a great way to add moisture to your curls when you’re in a hurry and don’t have time for the bowl method. Simply apply your leave-in product after washing your hair or as needed—just remember to apply it only from mid-lengths to ends to avoid unwanted buildup at your roots. Finish the look, by giving your hair a few good scrunches to help your curls take shape.
Style your curls in the shower.
Another substitute for the bowl method for curly hair is shower styling. Instead of using a bowl, apply your styling products directly to your wet strands in the shower after shampooing and conditioning. Then detangle and scrunch your curls in the shower, when there’s plenty of moisture in the air. With this approach, you won’t soak your mane repeatedly, but you should still get a similar effect to the bowl method.
For more personalized styling tips, use our salon locator to book an appointment with a pro near you.
Next Up: How To Dry Curly Hair: 6 Techniques You Need to Know About
Header photo credit: IG @chelseahln


